Art is a subject that interested me from a young age. Growing up, I would always sketch out things I saw that I found interesting. With modern technology, art is no longer limited to the stroke of a paintbrush. Today, paint and graphic editing programs allow us to utilize our creativity to create unique artwork by using intangible sketches and brushes on a digital screen.
You may have heard of popular graphics editing software such as Photoshop and Microsoft Paint which have millions of users. These type of programs are known as raster graphics editing software and have been around for over twenty years. The original Microsoft Paint was released in 1985 and Adobe Photoshop followed soon after in 1988. With continuous updates adding new features and functionality every year, users have the ability to create more and more art and edit their photos in creative and revolutionary ways. Raster graphics editing software begun with the basic features of sketching and painting and cropping images and has evolved to contain features such as automatic color balancing and image filters.
There are an abundance of graphics editing software each with slightly different features and interfaces, however, the majority contain the same basic features such as drawing, erasing, and painting using different colors. We will be creating a simple version of a graphics editing software that is quite similar to the original Paint program with the basic features mentioned previously.
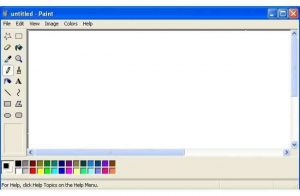
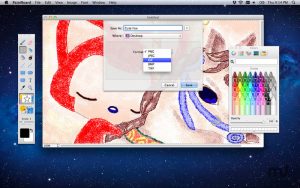
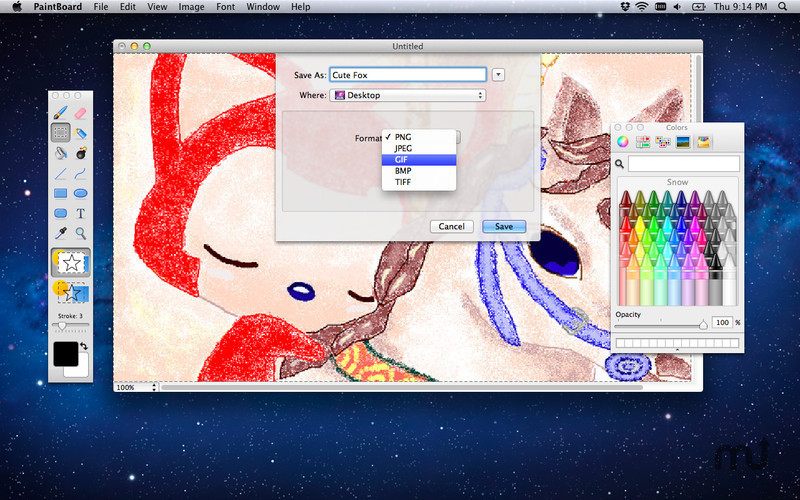
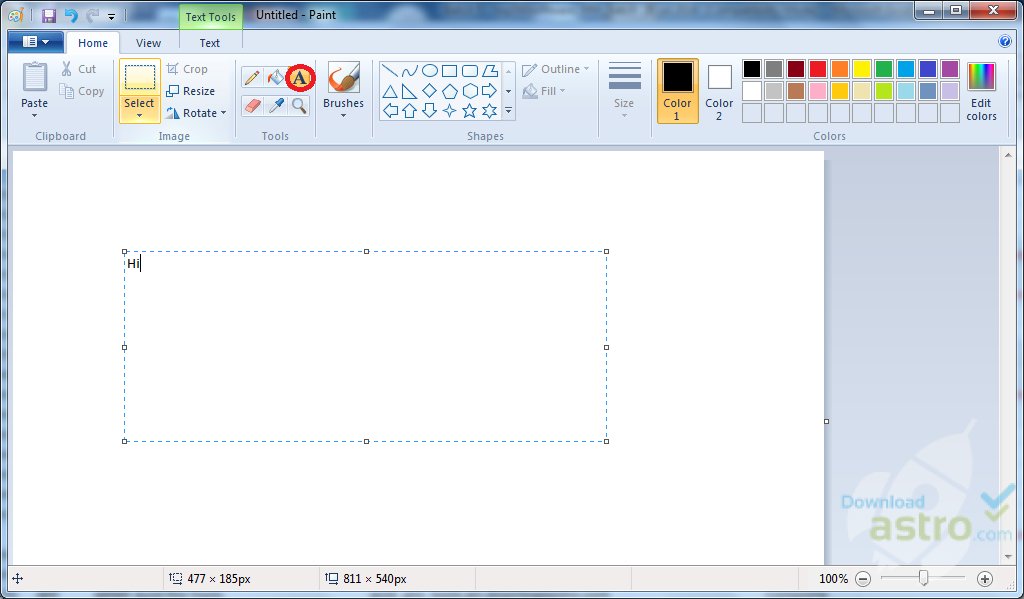
Pictured above is a comparison of the original Microsoft Paint and the modern day version of Paint and how graphics editing software has evolved over time.
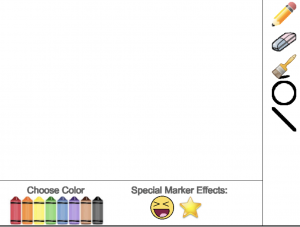
The outline we will follow to create our program is to first load in icons with the tools our paint program contains such as pencils and paintbrushes as buttons. We will then check if a particular button or tool is selected and then implement different things to draw onto the background depending on the tool selected.
class Button {
    int x;
    int y;
    int width;
    int height;   //usually 65
    int stroke;
    PImage img;
    int code;   //0 for pencil, 1 for eraser, etc.
    boolean isPressed;   //if selected

    Button(int x, int y, int width, int height, int stroke, PImage img, int code) {
        this.x = x;       //this for constructor
        this.y = y;
        this.width = width;
        this.height = height;
        this.stroke = stroke;
        this.img = img;
        this.code = code;

    }

    void drawbutton(){
        img.width = width;
        img.height = height;
        image(img,x,y);
    }


    boolean isButtonPressed() {
        if(mousePressed && mouseX > x && mouseX < (x+width) && mouseY > y && mouseY < (y+height)){
            return true;
        }
        return false;
    }


    void drawLines(){
            stroke(R, G, B);
            strokeWeight(this.stroke);
            if(code == 1){ //eraser
                stroke(255,255,255);
                strokeWeight(25);
            }
            if (code == 2) { //paintbrush
                strokeWeight(10);
            }
            line(pmouseX, pmouseY, mouseX, mouseY);
    }

    void drawEffects() {
        img.height = 35;
        img.width = 35;
        image(img, mouseX, mouseY);
        fill(0);
    }


}

int R, G, B;
ArrayList<Button> buttons = new ArrayList<Button>();
String[] urls = new String[]{"https://image.ibb.co/hpUTQy/pencil.png","https://image.ibb.co/hZfwCd/eraser.png","https://image.ibb.co/k45Vso/paint.png","https://image.ibb.co/dopbvy/circle.png","https://image.ibb.co/eMdaoJ/line.png"};
PImage colors;

void setup() {
    size(800, 600);
    background(255, 255, 255);

    for(int i = 0; i < 5; i++){
        //x, y, width, height, stroke, img, url, code
        Button tmp = new Button(725,5+70*i,65,65,1,loadImage(urls[i]),i);
        //load image returns the url
        //i is the code or index of array

        buttons.add(tmp);
    }

    PImage effect_img = loadImage("https://upload.wikimedia.org/wikipedia/commons/e/ec/Happy_smiley_face.png");
    PImage star_img = loadImage("https://image.ibb.co/jkpFTT/images.jpg");
    colors = loadImage("https://image.ibb.co/cqmjk8/do.jpg");

    Button effect = new Button(400,520,65,65,1,effect_img,5);
    Button star = new Button(475,520,65,65,1,star_img,6);
    // Button colors = new Button(0,520,300,80,1,colors_img,7);

    buttons.add(effect); buttons.add(star);
    // buttons.add(colors);

    //you may need to hardcode these ones like the ones above
    PImage insert = loadImage("https://image.ibb.co/jgKFoJ/Photo_icon.png");
    PImage airbrush = loadImage("https://image.ibb.co/mWAzFy/airbrush.png");

}

void draw() {

    //insert colorpicker

    colors.height = 80;
    colors.width = 300;
    image(colors, 0, 520);

    for(int i = 0; i < buttons.size(); i++){
        buttons.get(i).drawbutton();
    }
        //calls drawbutton() function

    for(int i = 0; i < buttons.size(); i++){
        if(buttons.get(i).isPressed && mousePressed && mouseX < 670 && mouseY < 455){// a button has been pressed
            //this means it's eraser or pencil
            if(buttons.get(i).code == 1 || buttons.get(i).code == 0 || buttons.get(i).code == 2){
                 buttons.get(i).drawLines();

            }
             if(buttons.get(i).code == 5 || buttons.get(i).code == 6) {
                 buttons.get(i).drawEffects();

            }

        }
    }

    //reset lines
    stroke(0);
    strokeWeight(1);
    line(0, 480, 700, 480);
    line(700, 0, 700, 600);


    fill(100, 100, 100);

    textAlign(LEFT, LEFT);
    textSize(25);
    text("Special Marker Effects:", 350, 515);
    text("Choose Color ", 72, 515);


}


int[] r_arr = new int[] {255,255,255,0,0,153,102,0};
int[] g_arr = new int[] {0,153,255,204,0,0,51,0};
int[] b_arr = new int[] {0,0,0,0,255,204,0,0};

void mousePressed() {

    //flags for pencil, eraser, paintbrush
    for(int i = 0; i < buttons.size(); i++){
        if(buttons.get(i).isButtonPressed()){
             for(int j = 0; j < buttons.size(); j++){
                buttons.get(j).isPressed = false;
             }
            buttons.get(i).isPressed = true;

        }
    }

    //choosing colors
    if (mouseX > 25 && mouseX < 273 && mouseY > 525 && mouseY < 590) {
        int index = int(mouseX - 30) / 30;
        R = r_arr[index];
        G = g_arr[index];
        B = b_arr[index];
    }

}
Our code above also accounts for choosing between different colors in a similar way. We check to see whether or not a different color is selected and we adjust our code to account for these colors.
Click
here to run our example program !
Although this paint program is very simplistic, it provides a foundation for users to add more features and functionality. It also shows how we can piece together simple concepts such as detecting mouse inputs and Image objects to create something applicable and functional such as a paint program. With the fundamental software in place, implementing more advanced popular features contained in mainstream raster graphics editing software such as image filtering is very feasible.
[wpforms id=”2359″ description=”true”]
 You may have heard of popular graphics editing software such as Photoshop and Microsoft Paint which have millions of users. These type of programs are known as raster graphics editing software and have been around for over twenty years. The original Microsoft Paint was released in 1985 and Adobe Photoshop followed soon after in 1988. With continuous updates adding new features and functionality every year, users have the ability to create more and more art and edit their photos in creative and revolutionary ways. Raster graphics editing software begun with the basic features of sketching and painting and cropping images and has evolved to contain features such as automatic color balancing and image filters.
There are an abundance of graphics editing software each with slightly different features and interfaces, however, the majority contain the same basic features such as drawing, erasing, and painting using different colors. We will be creating a simple version of a graphics editing software that is quite similar to the original Paint program with the basic features mentioned previously.
You may have heard of popular graphics editing software such as Photoshop and Microsoft Paint which have millions of users. These type of programs are known as raster graphics editing software and have been around for over twenty years. The original Microsoft Paint was released in 1985 and Adobe Photoshop followed soon after in 1988. With continuous updates adding new features and functionality every year, users have the ability to create more and more art and edit their photos in creative and revolutionary ways. Raster graphics editing software begun with the basic features of sketching and painting and cropping images and has evolved to contain features such as automatic color balancing and image filters.
There are an abundance of graphics editing software each with slightly different features and interfaces, however, the majority contain the same basic features such as drawing, erasing, and painting using different colors. We will be creating a simple version of a graphics editing software that is quite similar to the original Paint program with the basic features mentioned previously.

 Although this paint program is very simplistic, it provides a foundation for users to add more features and functionality. It also shows how we can piece together simple concepts such as detecting mouse inputs and Image objects to create something applicable and functional such as a paint program. With the fundamental software in place, implementing more advanced popular features contained in mainstream raster graphics editing software such as image filtering is very feasible.
[wpforms id=”2359″ description=”true”]
Although this paint program is very simplistic, it provides a foundation for users to add more features and functionality. It also shows how we can piece together simple concepts such as detecting mouse inputs and Image objects to create something applicable and functional such as a paint program. With the fundamental software in place, implementing more advanced popular features contained in mainstream raster graphics editing software such as image filtering is very feasible.
[wpforms id=”2359″ description=”true”]